|
**NOTE** THIS IS NOT FOR ALL HONDA'S |
|
Before you do anything, you should know: It may not be legal in all areas. It may or may not cause damage to the car, the bulb, etc. Perform this modification at your own risk. I am not responsible for any damages or problems of any kind. |
|
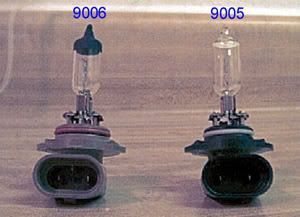
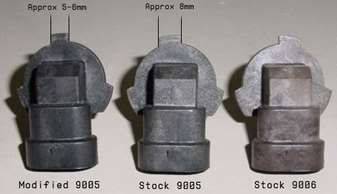
The 9006 bulbs have the tip of the bulb covered to reduce the light output, but 9005's don't. I think that's a big part of why 9005's put out so much more light. |
| 1) The notches inside the connector (on the top of the inside) is different. There's one notch for 9006 and two for 9005. In the picture above, it's visible on the 9006 but not visible on the 9005. They are there to prevent us from plugging in the wrong kind of bulb, so we'll have to remove that restriction. The solution is to just remove the 2 notches from the 9005. I used a pocket knife, but it may also be possible to file it down or use a Dremel to grind it down. | 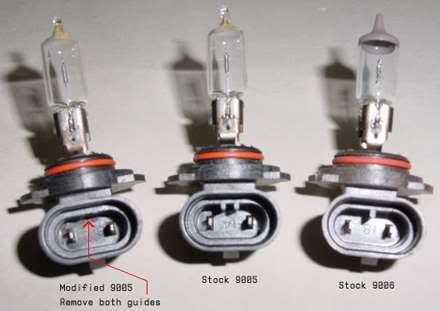 Special thanks to Pb Foot from Carolinahondas.com for this pic. |
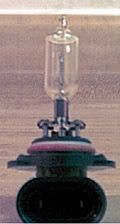 |
2) The rubber ring is different size. The ring around the 9006 (red in the picture) is slightly larger than the ring on the 9005 (white in the picture). You just have to take the ring off of a spare 9006 bulb and add it to the 9005. You'll end up with something that looks like this. <<<<<<<<<<<<<<<<< (Notice the red ring in addition to the white ring) |
| 3) The plastic is also a little different. It's just another way to prevent us from plugging in the wrong king of bulb, so we'll have to change that too. As you can see to the left, there is only one difference (top of pic, in the middle). The notches in the middle are opposite of each other. | 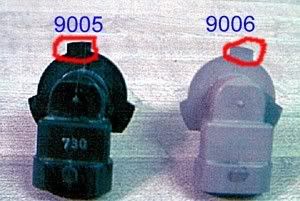 |
 |
Get rid of the outside half of it so that only the part at the center is left. <<<<<<<<<<<<< |
| (NOTE the Red in this pic is showing what was removed) | 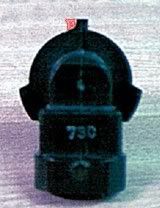 |
| Now your all done. Plug it in, adjust your headlights down a little and have a BRIGHT day. |